Getting Started — the first-run setup wizard
The first time you launch the Echidna companion app it opens a 13-step setup wizard instead of the normal app. The wizard walks you through permissions, a device compatibility probe, a mandatory recovery acknowledgement, appearance, your first preset and target apps, notifications, the Quick Settings tile, engine detection, and a hands-on Lab demo — then drops you at the Dashboard.
What this wizard does and does not prove
The wizard configures the app and detects your device state honestly. It does not flash anything, does not gain root, and does not prove that audio interception works on your phone. On an unrooted device it will tell you plainly that the interception engine is not installed — see step 11. The only thing the wizard lets you hear working is the Lab, which runs your own microphone and test tones through the DSP engine locally, with no root and no other app involved.
You can re-run this any time
Setup is not one-shot. Everything here is also reachable from the normal app, and you can replay the whole wizard from Settings → Run setup again. The "onboarding complete" flag is stored per device and is intentionally not restored when you import a settings profile, so a fresh device always sees the wizard.
Wizard navigation
Every step shares the same chrome:
| Control | Location | Behaviour |
|---|---|---|
| Step n of 13 · label | header | Progress text + a LinearProgressIndicator. |
| Skip setup | header | Abandons the whole wizard and marks setup complete. |
| Back | bottom bar | Previous step; disabled on step 1. |
| Skip | bottom bar | Skips the current step; hidden on the last step. |
| Next / Enter Echidna | bottom bar | Advances; the label becomes Enter Echidna on the final step. |
One step you cannot skip past
The Recovery step (step 4) is the single gate. Both Next and Skip stay disabled until you tick the acknowledgement checkbox. Until then the step shows, in red: "Acknowledge to continue. (This is the one step you can't skip past.)"
Step 1 — Welcome
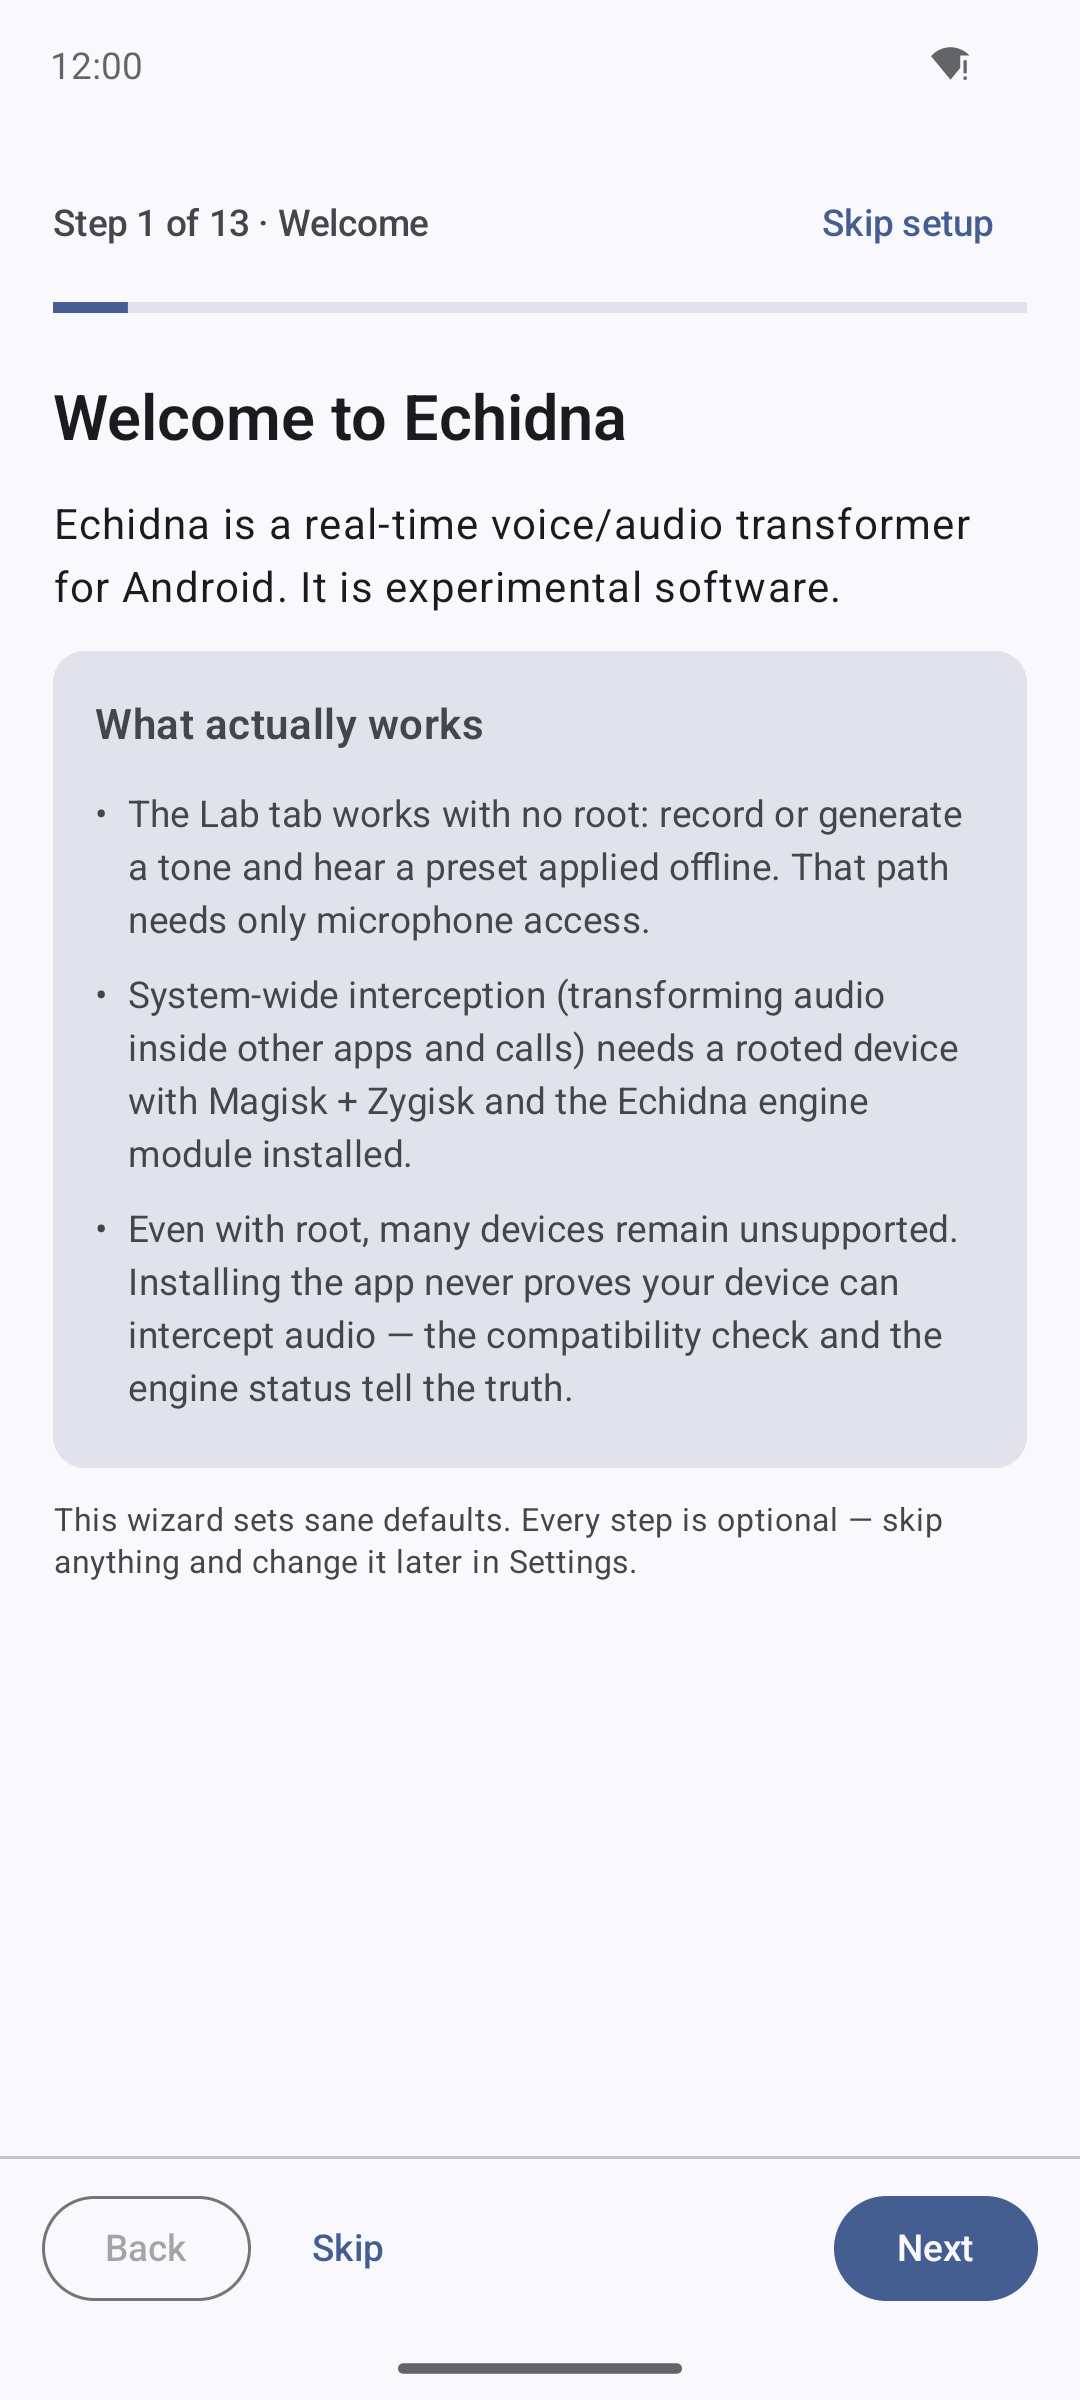
Step 1 of 13 on an unrooted Android 14 emulator. The "What actually works" card sets expectations honestly before anything is installed.
The Welcome screen introduces Echidna and shows a "What actually works" card that states the ground truth up front:
- The Lab tab needs no root — it demonstrates the DSP transform locally.
- System-wide interception of other apps requires a rooted device with Magisk + Zygisk and the Echidna engine module.
- Even with root, many devices are unsupported — vendor audio stacks, SELinux policy, and CPU ABI all vary.
Step 2 — Permissions
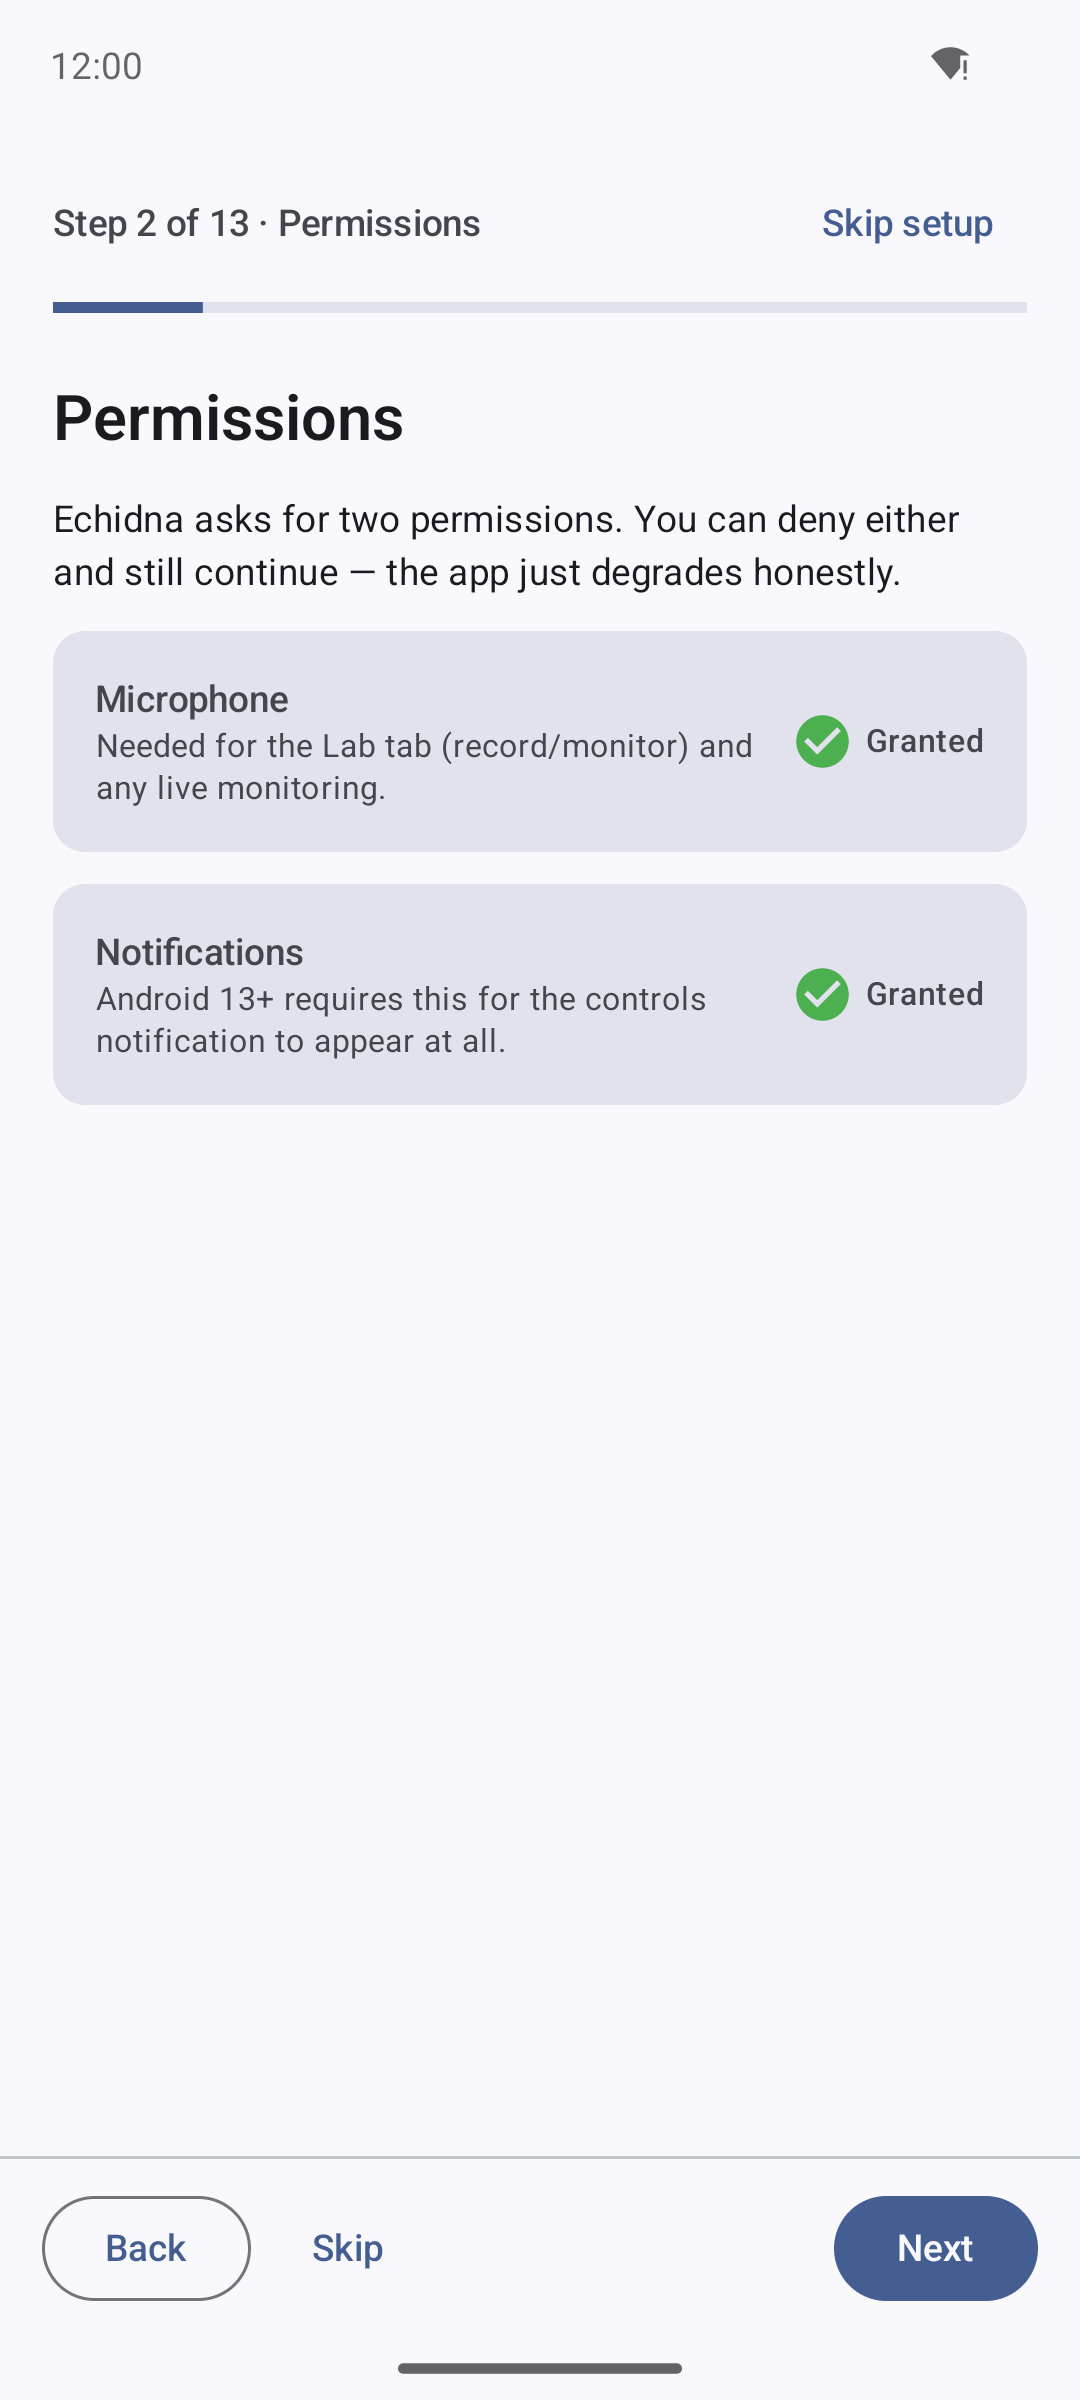
Step 2 of 13: the Microphone and Notifications rows. Either can be denied — the app degrades honestly rather than trapping you.
Echidna requests only what it needs:
- Microphone (
RECORD_AUDIO) — required for the Lab input meter, recording, and the realtime monitor. - Notifications (
POST_NOTIFICATIONS, Android 13+ only) — for the optional controls notification.
Each row shows a Granted tag or a Grant button. Denial is allowed; the wizard does not trap you. Microphone access can also be granted later from the Lab tab.
Step 3 — Device compatibility
Runs the same probes as the standalone Compatibility Wizard and reports a pass · warn · fail tally plus SELinux status. This is a read-only probe — it inspects the device, it does not change it.
A probe is not a guarantee
A clean tally means the checks Echidna can run from an app context look healthy. It is not proof that live capture interception will work — that remains device-gated and is covered in Verification.
Step 4 — Before you install a root module
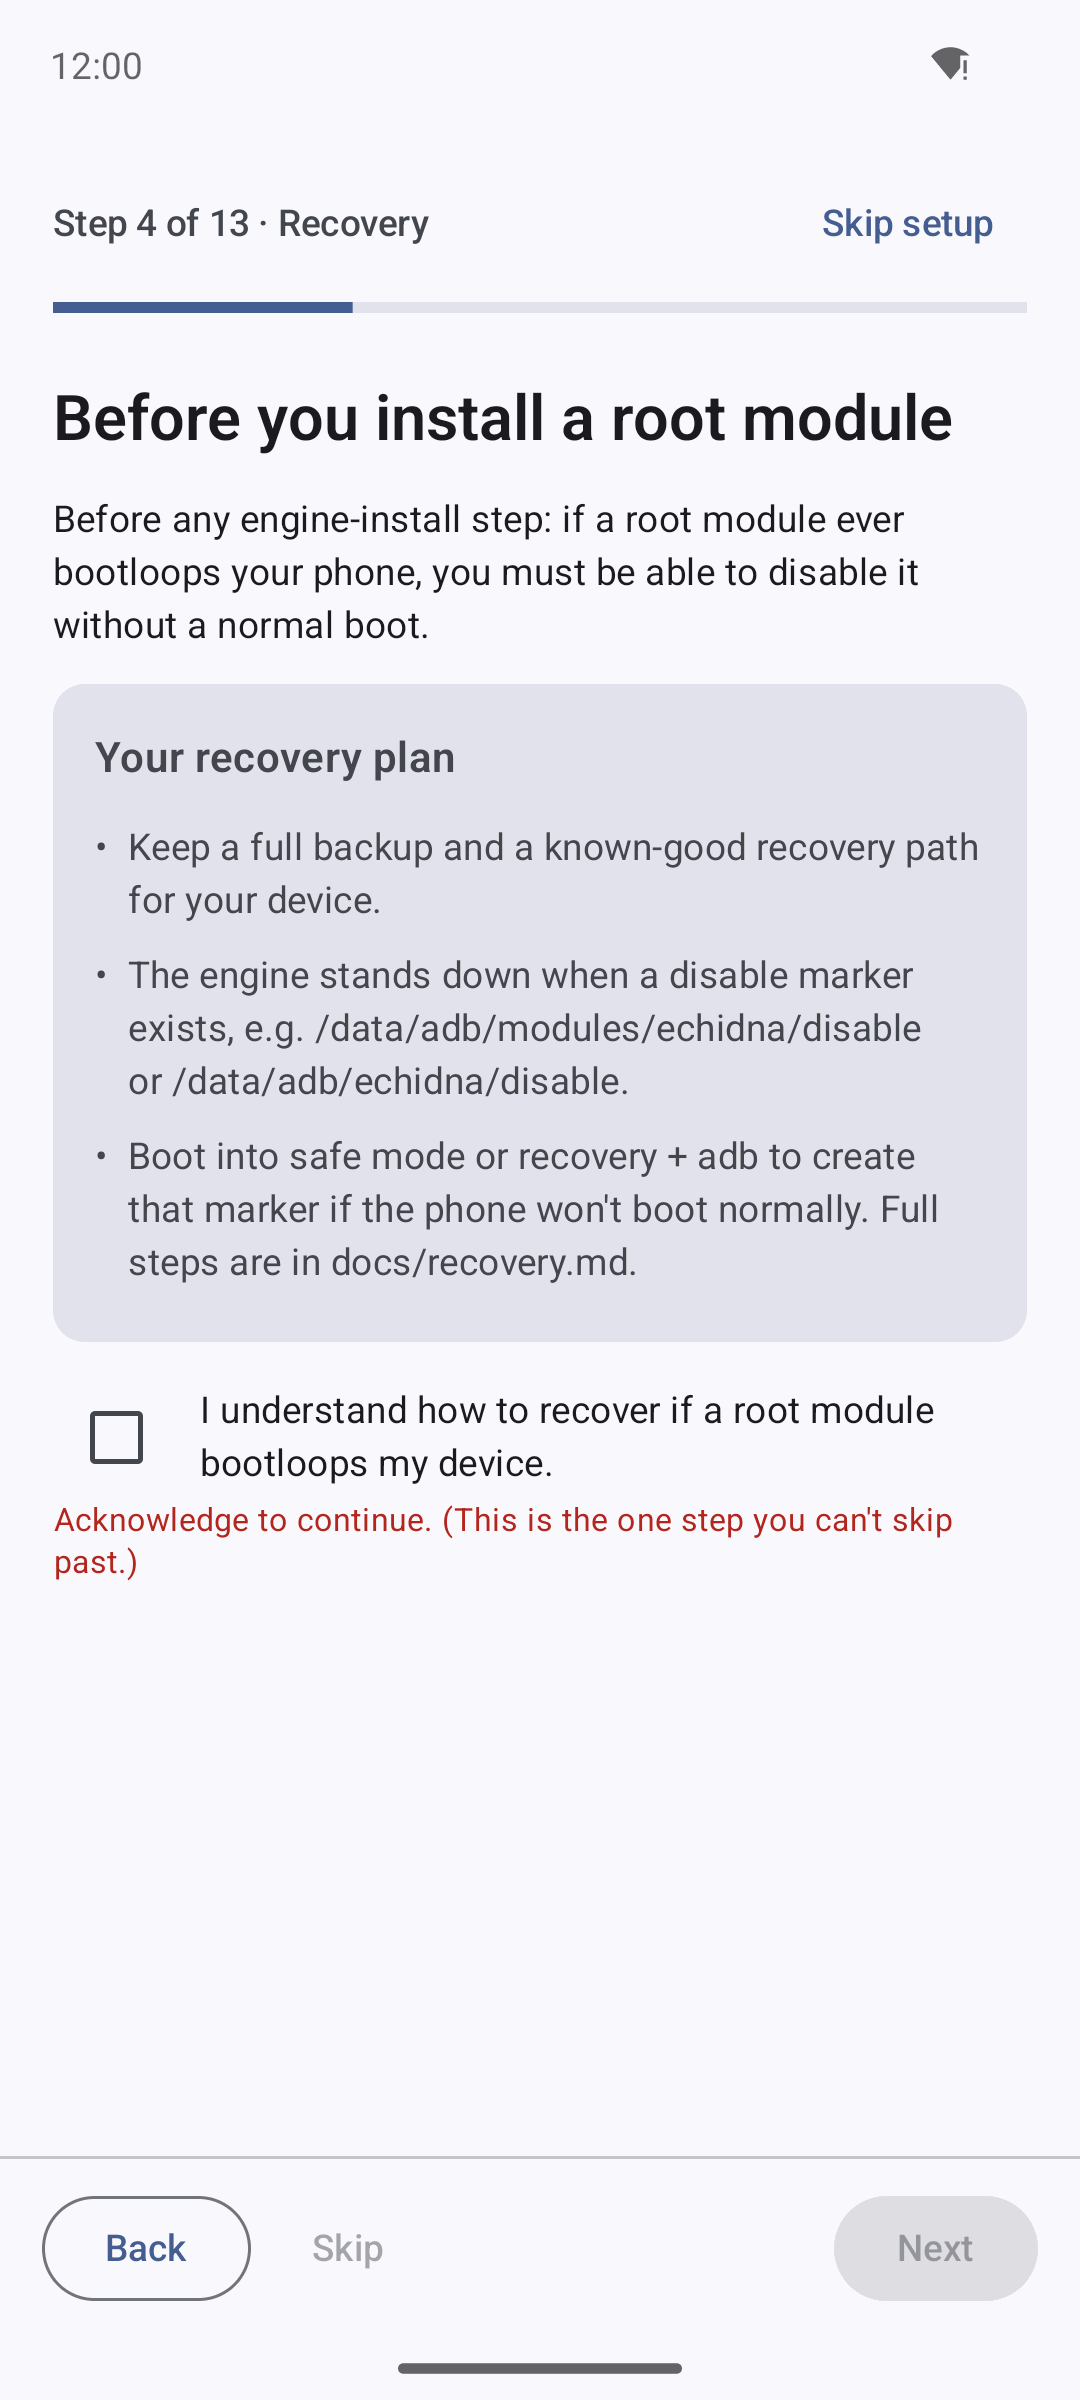
The Recovery step is the one gate in the wizard: Next and Skip stay disabled until the acknowledgement checkbox is ticked.
A recovery-plan card followed by a mandatory checkbox:
"I understand how to recover if a root module bootloops my device."
You must tick it to continue. If you cannot honestly tick it, stop and read Recovering from a bootloop and Limitations first. This gate exists because a bad root module can leave a phone boot-looping, and the safe rescue paths must be understood before you flash anything.
Step 5 — Make it yours (theme)
Pick your appearance; changes apply immediately:
- Theme mode chips — System / Light / Dark.
- Material You colors toggle — Android 12+ only; uses the system dynamic palette from your wallpaper. Turn it off to pick an accent.
- Accent swatches — six curated accents (Violet, Blue, Teal, Green, Amber, Rose), available when Material You is off.
Full detail is in Theming.
Step 6 — Pick a starting preset
A radio list of the built-in presets (Natural Mask, Darth Vader, Helium, …). Selecting one sets it as the active preset. The full catalog and every parameter are documented in DSP & Effects.
Step 7 — Choose target apps
A checkbox list of up to 40 installed, launchable apps. The ones you check are added to the per-app whitelist.
Hooking is fail-closed
Whitelisting an app here does not start intercepting it. A process is only ever hooked when it is both whitelisted and the engine is actually installed and enabled on a rooted device. On an unrooted phone this list is simply saved for later.
Step 8 — Advisory alerts
A single master toggle, "Show advisory alerts", that flips all four alert categories (install, bridge/hook-scope, hardware, install mix-up) on or off. You can tune the categories individually later; see Alerts.
Step 9 — Controls notification
- Controls notification toggle — a persistent notification with quick controls.
- High-priority notification toggle — gated on the persistent notification being on.
Step 10 — Quick Settings tile
- Enable the Quick Settings tile toggle. When off, the tile shows as Unavailable.
- Add tile now button (Android 13+ / API 33+) to place the tile in one tap, or manual instructions on older versions.
Step 11 — Interception engine
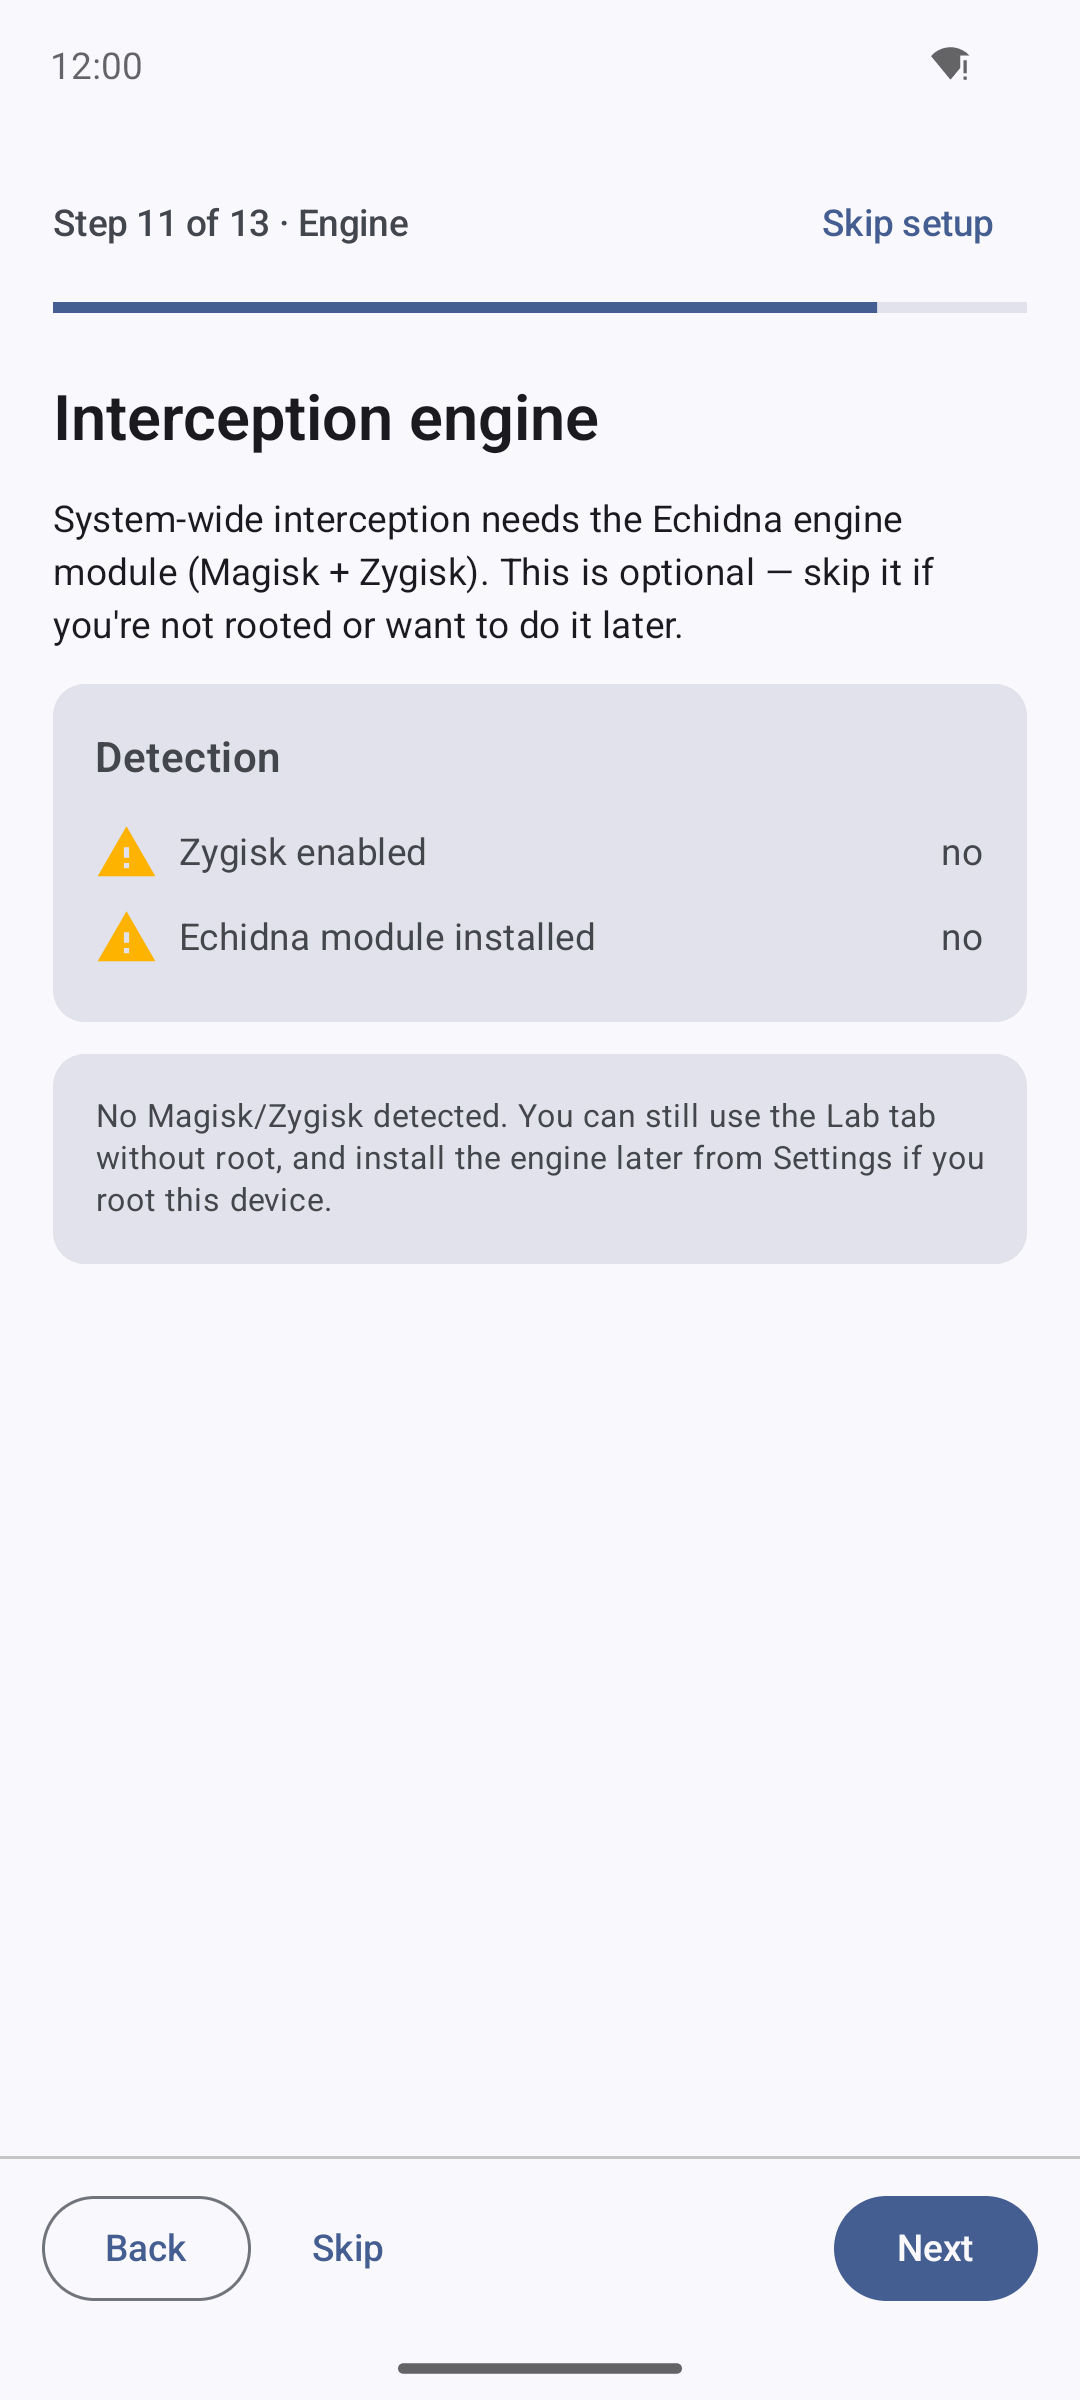
Step 11 of 13 on an unrooted emulator. The detection rows read Zygisk no and Echidna module no, and the copy is honest: you can still use the Lab without root and install the engine later if you root the device. The guided installer itself is shown in Build & Install.
Two detection rows, each rendering yes / no:
- Zygisk enabled
- Echidna module installed
When both are detected, the step offers Open Magisk / Open installer buttons. When neither is detected it says, honestly:
"No Magisk/Zygisk detected. You can still use the Lab tab without root, and install the engine later from Settings if you root this device."
Unrooted = engine not installed
On an unrooted device or emulator this step and the Dashboard's Engine Status card read Engine not installed. That is the truthful state — nothing was flashed. Installing the engine is a separate, device-gated procedure covered in Build & Install and the Installer guide.
Step 12 — Hear it work (Lab hand-off)
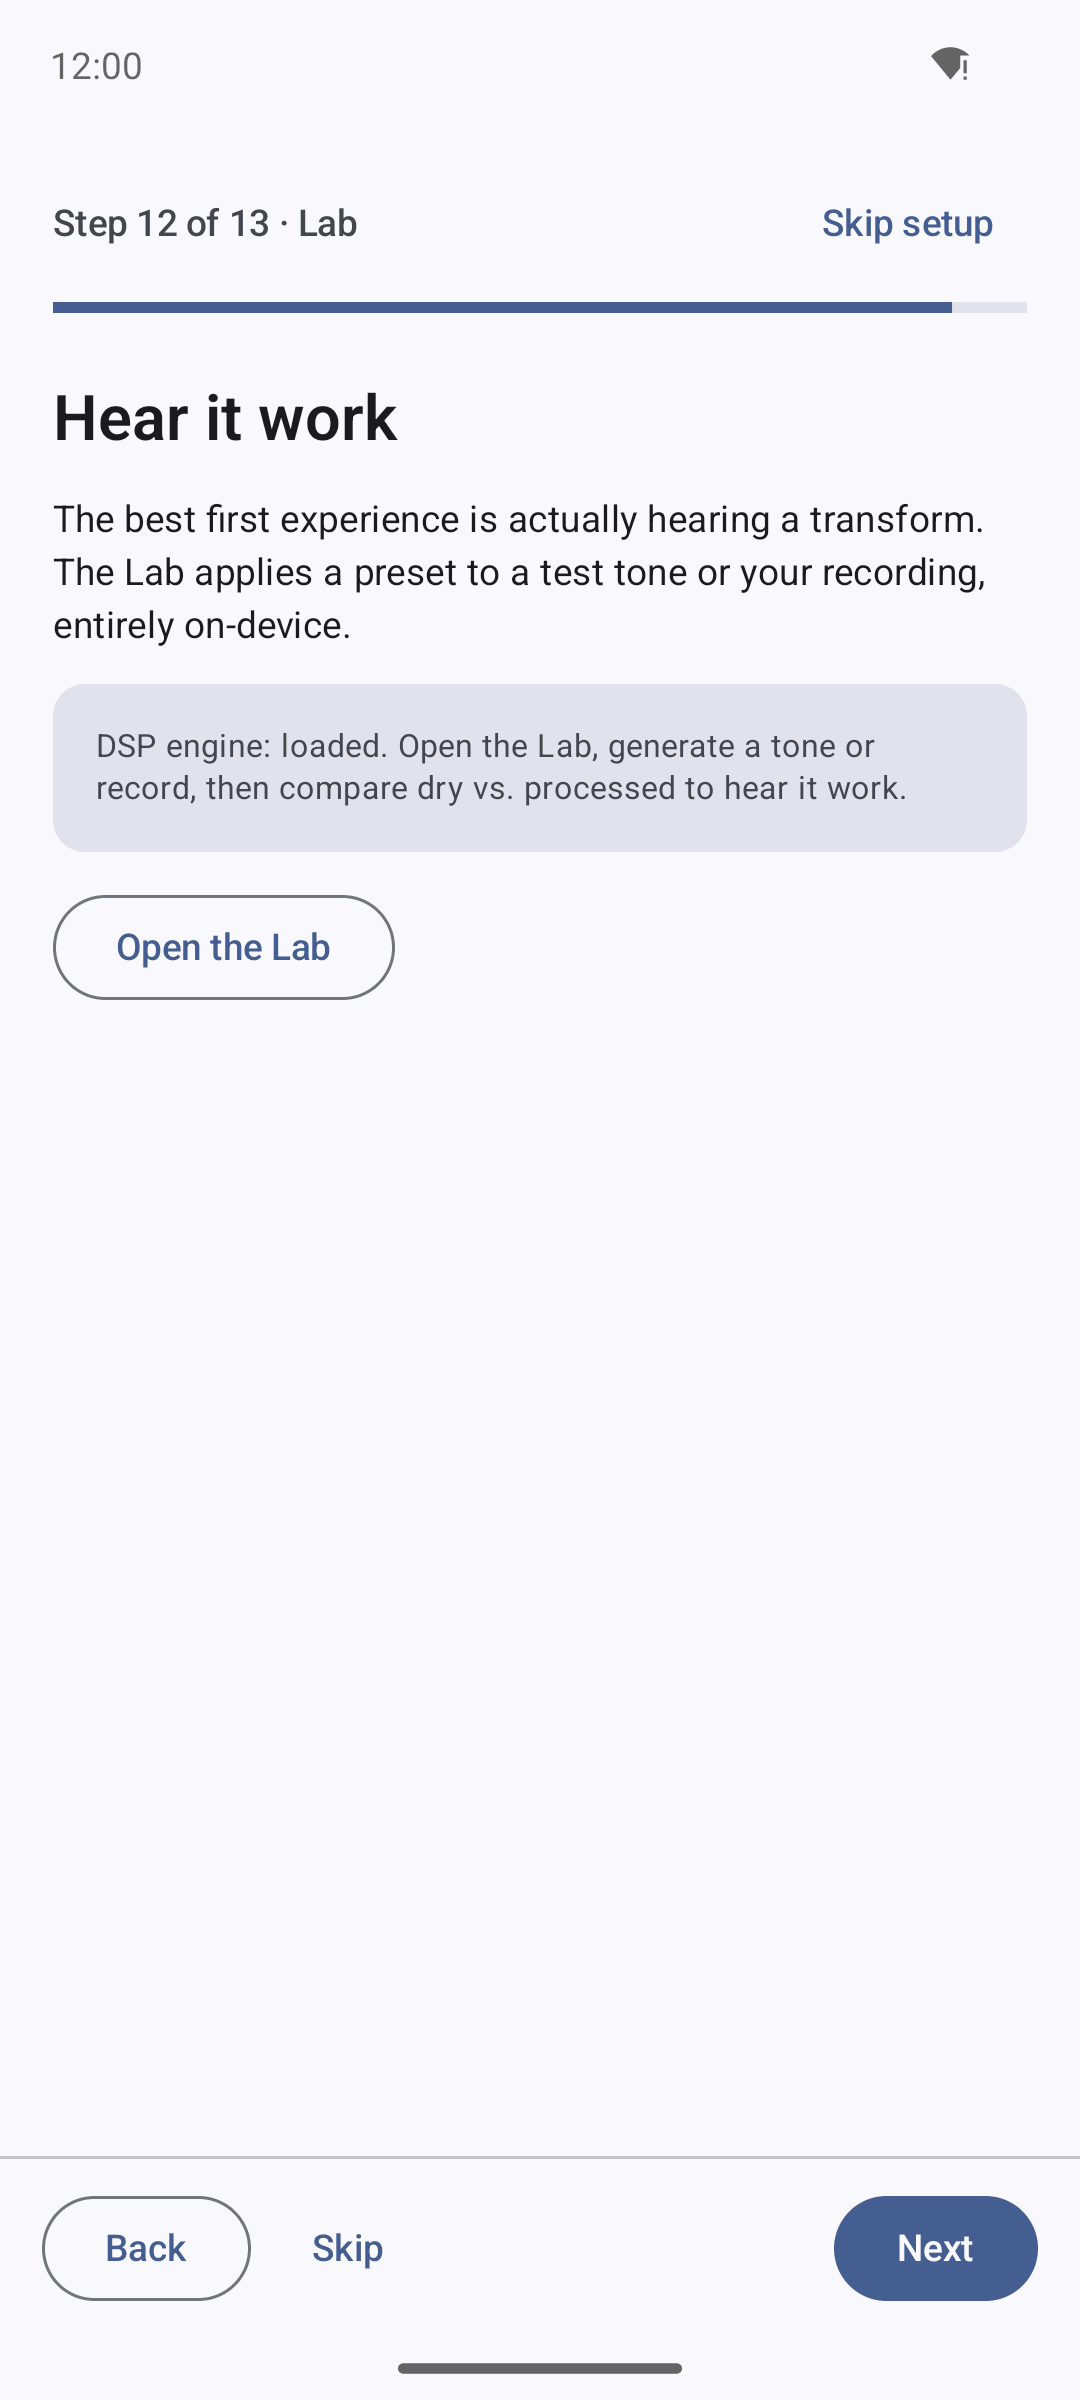
Step 12 of 13. With the DSP engine loaded, the wizard offers an Open the Lab action so you can hear a preset applied to your own audio locally — before any root or install.
Hands you off to the Lab with an Open the Lab button. On a "lite" build without the native engine it reads:
"DSP engine: unavailable (lite build). This build can't process audio locally…"
and offers Open the Lab anyway. The Lab is where the DSP transform becomes audible — locally, honestly, and without touching any other app. See The Lab.
Step 13 — You're set up
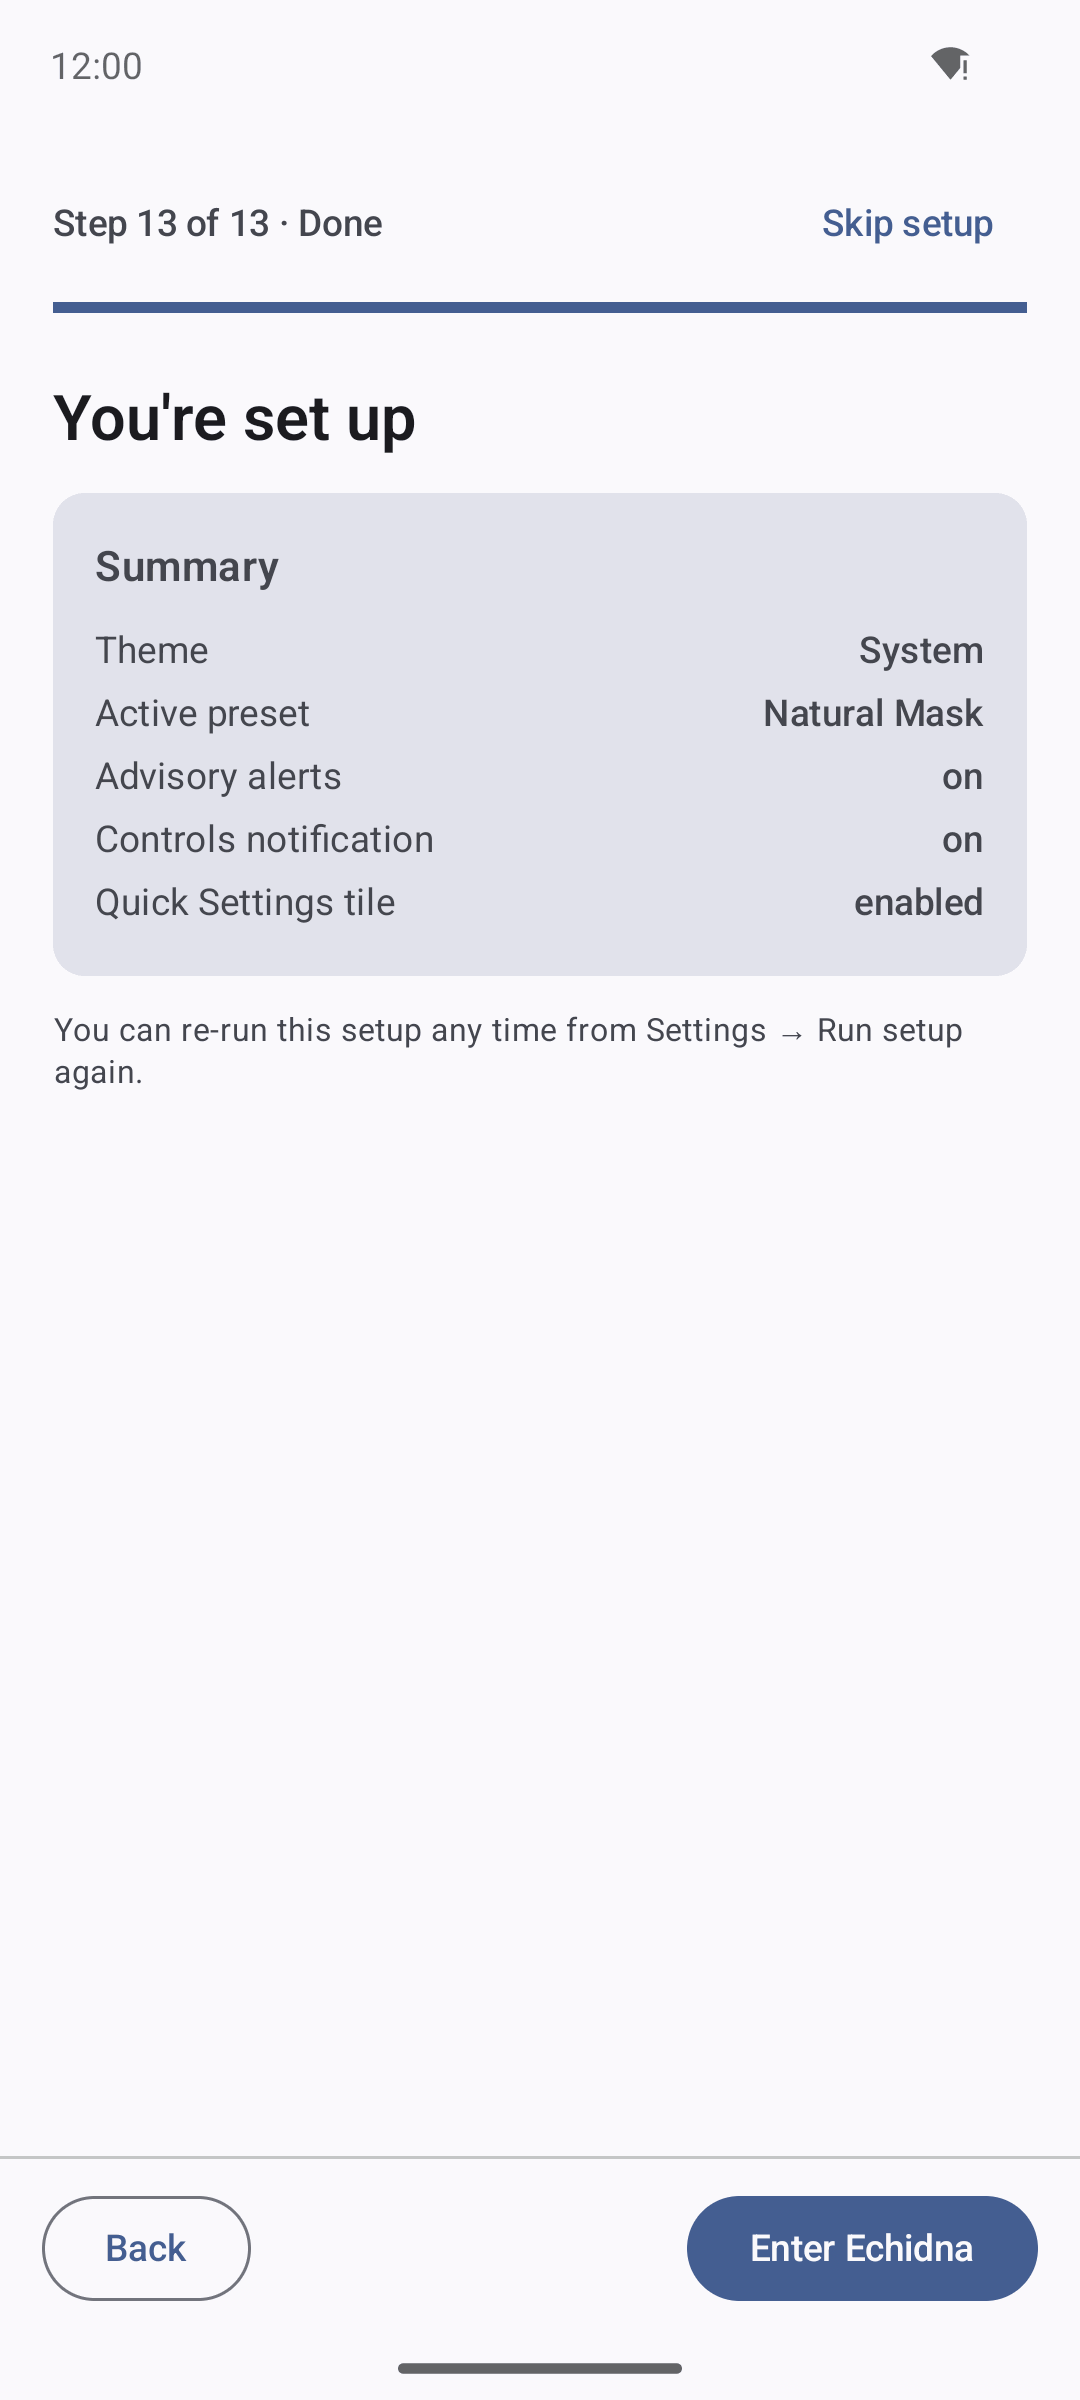
The final step summarises your choices — theme, active preset, alerts, controls notification, Quick Settings tile — and finishes with Enter Echidna.
A summary of your choices — Theme, Active preset, Advisory alerts, Controls notification, Quick Settings tile — plus the reminder:
"You can re-run this setup any time from Settings → Run setup again."
The Enter Echidna button finishes the wizard and opens the Dashboard.
Where to go next
- The Lab — hear the DSP transform locally (no root).
- Theming — Light/Dark/System, Material You, accents.
- DSP & Effects — the effect chain and preset catalog.
- In-app Help & search — the bundled docs, searchable offline.
- Build & Install — building artifacts and the device-gated install path.
- Verification — what is actually proven vs. device-gated.